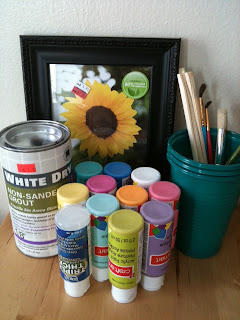
Everyone likes a good two for one deal, right? Well, in today's post you get just that; I have a fun photo frame chalkboard tutorial that includes an exciting chalkboard paint tutorial. I cannot express how excited I am to share this tutorial with you all!
My cost: less than $10
Supply List:
Acrylic or latex craft paint
Gloss paint (to add shine to the frame)
White, dry, non-sanded Grout
Picture frame (your choice of size)
Sand paper
Paint sponges or brushesWashable/recyclable mixing bowls
Chalk
 | ||||||||
| My supplies - minus the sandpaper |
 |
| Ready for a coating of gloss |
The ratio I used was approximately 4:1, four parts paint to one part dry grout. In measurement terms, I used about a teaspoon of dry grout and four teaspoons of paint the first time and it turned out nicely. Play with the mixture on your own, and go for a 'brownie batter' consistency. Get rid of as many lumps in the mixture as possible (some are ok).
Step 3 - Prepping and painting your chalkboard: Lay your piece of glass down on a flat surface and sand one side until it is evenly and thoroughly scratched up. Shoot for the 'more scratched up than my old pair of glasses' look. Next, put that chalkboard paint to use and slather it all over the newly scratched up glass. You will need multiple coats to create an even coating, so let this coat dry for a bit. Keep applying coats of chalkboard paint until you are happy with the overall appearance.
Step 4 - Letting it all dry: I cannot stress how important it is to let everything dry overnight. Give it at least 8-12 hours, in a safe place where it won't be touched, bumped or messed with.
...Ok, ok... so if you are really eager to use your chalkboard, I've heard that using a blow-dryer to speed up the drying process works well. I haven't tried it, so I can't attest to the effectiveness, but I'm pretty sure it works.
Step 5 - Priming and reassembling your chalkboard: Take a piece of chalk, lay it on it's side and then rub it all over your nice, clean new chalkboard. Get it nice and chalky and then erase it with a dry eraser or paper towel. Reassemble the picture frame; I kept the extra cardboard and replaced it behind the glass for added support. Project complete! Now you can write on your fantastic new chalkboard all you want.


Cute and Fun!
ReplyDeleteThank you Lisa!
ReplyDelete